Friday, September 13, 2013

LEP classes for the "W" They actually got a quilt made. WOW!

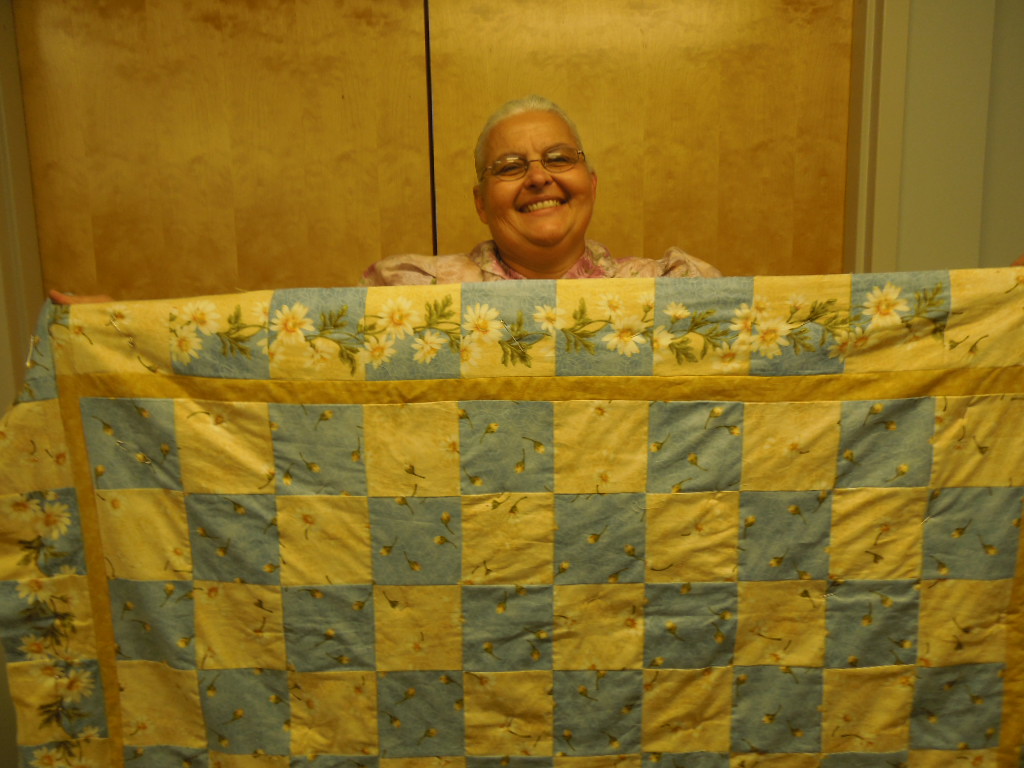
Yvonne 
almost has her Christmas quilt completed.  It is a gift for someone, all she likes now is a little more quilting and the binding and label.

Look how beautiful, she has done a wonderful job. This is her very first quilt.  Give her some comments.

WOW! Look at this one.  Reba really came out of the box and did her own thing on this beautifuf quilt.

Reba did her quilting in her own way.  She decided to quilt hers in this way and it is just beautiful and this was her first one.

Gwen brought her babies to class today.  They were remarkable well behaved children.  She and some of the kids at her church made them for a project.  They were so very cute.

She also finished her quilt, binding and all it.  Her corners were nice and crisp and her quilt is so beautiful, isn't it?  Comments please.


Hazel with her very first machine quilted quilt.  What a great job she did.

She nicely quilted it as I told her to, which was a harder way.  She sewed all the way around each block and I think we had 100 blocks in each quilt Hazel.


Darlene had miss a couple of classes, but failed to hold this lady back.  She has her quilt sandwiched and ready to quilt.  So very pretty.

Look at Darlene's outer border.  I found it quiet unusual.  It was a bordered fabric matching her fabric, however she found a clever way to cut and piece it to get this unusal border.
Wow Hilda, it's beautiful
Frances selected this beautiful fabric to make her quilt. Great choice Frances.


Take a look at her quilting.  She did such a good job for her first time at machine quilting.  She also does hand quilting.  Beautiful!!!!

Last but also the youngest is our own Hannah Son.  This was her very first and she did an outstanding job.  What a difference a few scraps can make in one's life

Look what an awesome job she is doing in her quilting.  This one will go far in quilting if she continues, and I hope she does.

I was demoing a new block for them to learn and used Yvonne for my sewer with the rest of us looking on.

O K this is the group and everyone has made their very own quilt.  We also had fun while we worked.

More pics of the group.


What a group of happy ladies.   Wanna' know why they are so happy?  They all have just made a quilt, all by themselves.  I am soooo proud of them  I could just about cry.

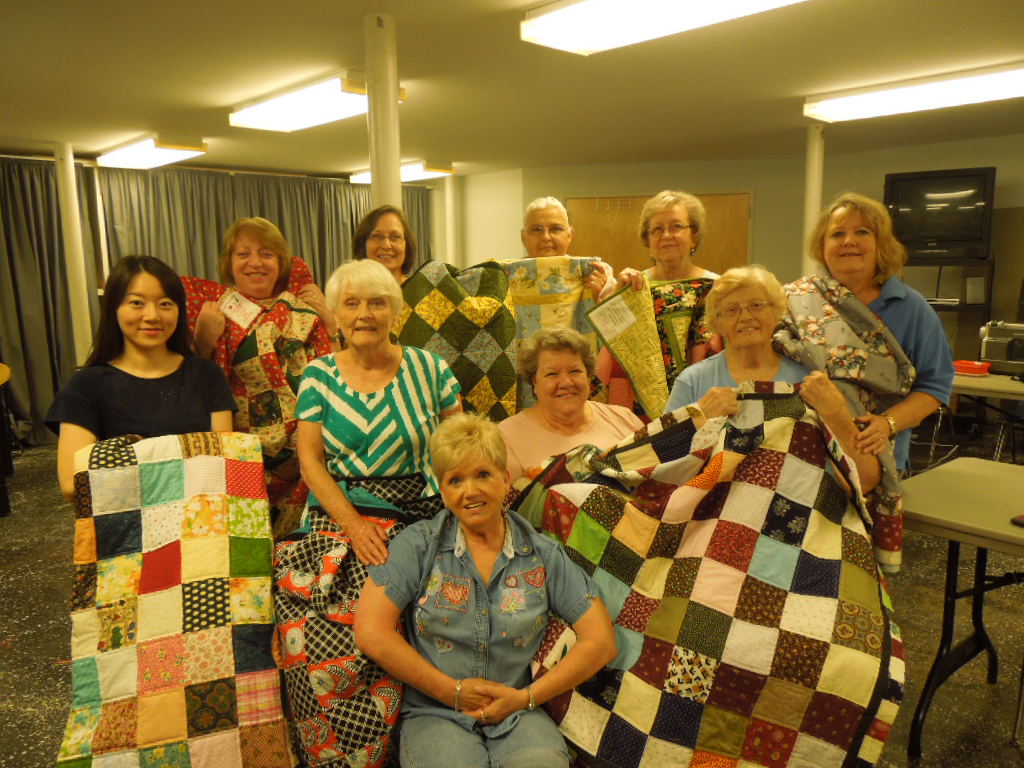
What a colorful picture with all these quilts. I see Hilda in this pic with her quilt and don't know why I did not get an individual pic of her and her quilt.  I must have posted it another post before this one, shall look and see.  I am thinking she was the first to complete hers.
Just had to get one more shot of them and their quilts.  Just beautiful ladies, you should be proud of yourselves.

Monday, September 9, 2013

Ms. University for Women, Life Enrichment Program. Teaching a quilt class for them.

This is my friend Ebba K.  She has been with me through teaching this quilting class through every class.  She is an avid quilter and loves sharing this art as much as I do.  Don't Know what I would have done without her.  She is the greatest.

I was asked about teaching this class for the "W" and was a little hesitant about it at first, and now, I would not trade it for the world.  You meet some of the nicest people doing a quilting class.  These ladies were so eager and wanting to learn and I felt the same way about sharing the things I have learned about quilting.

They started with scraps and fabric and will soon have a lovely quilt.

This is Janie, so intent on her work of art.  She is challenged with a minor physical problem, but do you think that slowed Janie down?  No, she has determination and wanted to learning quilting.

This is Gwen S.  So eager, I had to hold her down.  She likely was among the first to complete hers.  This class has only been going on for 4 weeks and only 1 hour per day, one day per week.

Yvonne B. working on a Christmas quilt and doing such a great job.  She pays close attention and absorbs all she can. If there was one thing to say about Yvonne, it would be the fear of making a mistake but has come a long way on that.  I think we all have that fear of trying for the first time and messing up.  I tell you this, if you quilt, you WILL mess up once in a while, even the Pros mess up.  She has let go of a lot of that and is doing a fantastic job.

Hazel L is from Al. (Roll Tide Roll)  I was delighted to find 2 of the girls was from my own Alabama.  Hazel's quilt is going to be so very pretty.  Seems like some of these girls might have done a little quilting before and wanted to learn to quilt on the machine.  Not real sure.  She was doig a really good job. 

This is Darlene.  She was unable to be at the first meeting but did make the second.  Told her what to do to catch up with us via e-mail.  She came in and Alakazam, she was right up with us.  She might not have quilted before, but she sure did know how to handle that sewing machine.   Doing her quilt in pale blue and yellow, gonna' be so pretty.  She will miss this next meeting, my last one, but I hope she will e-mail me a pic of her quilt.

Hilda A. is working intently on her quilt.  She had hers completed last week.  It is absolutely beautiful.  She used Christmas fabrics on hers too.  I don't think this was her first trip around the block.  I am not sure I taught her anything she did not already know, but; I sure did enjoy having her in my class.

Hannah sewing with a smile.  She always had a smile on her face for everyone.  She has never quilted before and wants to desperately and Ebba and I will share with her any knowledge we can.  Ebba has been so much help with Hannah.  She is the baby of the group and a joy to be around.

Another Alabama girl. This is Reba C.  She is doing such a great job on her quilt.  She has also excelled in her quilting.  She had sandwiched and was pinning it last week, so I am thinking she has been quilting on it this week. 
Lunchtime
Great picture Ebba!
Wow Hilda, it's beautiful

Reba pinning hers getting ready to quilt it.  Notice the way she layed out her blocks in a different pattern, clever.  Frances is helping her.
Unsure what Gwen is doing, thinking she is packing to leave.
Add caption
Yvonne is preparing to start her quilting. Yea!!!! It will be so pretty.
So pretty!

OH NO, what have I done?
All finished..Beautiful!

Last but not least is Frances G. Great girl and loves quilting. Sometimes she might have a little problem like sewing a little twist in her binding, but she knows how to fix that now.
Hannah and Janie looking at a couple of my Art Quilts.
Reba and Yvonne in deep discussion.
Frances is beginning to machine quilt on hers,  Wow, look at those colors.
Hilda is talking to Gwen about the batting maybe, I think.
Great smile Ebba.
Not sure what Reba is up to.
I showed them how to make the 3 Dudes block and Janie is checking hers out.


And now it is back to work.


Thursday, September 5, 2013

Quilt Binding Tutorial

This is a tutorial on putting a binding around the edge of a quilt.  It is really a simple thing to do, so, don't make it harder than it actually is.  Cut your strips for your binding 2 1/4 to 2 1/2 inches wide, cutting enough strips to go all the way around your quilt.  Cutting across the width of your fabric.

Join these strips together as shown in this picture, placing right sides together.

Place under machine like you see in this picture.  You will sew from the upper left hand corner to the bottom right hand corner and turn to make sure it fits properly.

Please note that I have left the least little bit of the bottom strip sticking out from the bottom to the top and to the right.  This was done so you can see the bottom, so it will go straight.  You will sew by the top strip, corner to corner, NOT the bottom.


After you have sewn your strips together,  fold and press this strip in half lengthwise.  Leaving apprx. 5 inches tail hanging loose, begin sewing the strip (on top) onto the quilt edge using your quaarter foot.  Let your quilt edge peep out from under your quilt ever so slightly at the edge.  This will prevent it from sliding underneath the binding and not get caught in your seam.

Note the quilt edge peeping out from under the quilt.

.
Just before you get to the corner, stop 1/4 inch away from the corner, with the needle down, pivot your quilt to where you can sew it directly into the corner.  Cut thread and turn the quilt around.  Let your pressure foot help you hold your quilt in place while you prepare the corner.

Fold your strip into kind of triangular position as shown in the above picture.

Bring it back down into position as shown.

When that is accomplished, begin sewing at the end and continue around coming to the end, leave a 5 inch space on your sewing space and for the tail, 8 in length also and trim off excess..........Now you must join the ends in a seam just like the other seams have been joined.  To do this you must measure...  If your binding was cut at 2 1/2 inches, then place the excess tails on top of each other lapping them.  Measure the lapped over binding and it must be a 2 1/2 inch lap. Now you can trim off the excess tail and sew together just as you did the other binding strips.  It should fit exactly.  You can now finish sewing on your binding.  Now press open the binding seam so it lays toward the backside of your quilt and hand stitch on the back.  If you have followed this guide, you will have pristine sharp corners and a lovely quilt.  Don't forget your labels.